Tuesday, March 31, 2015

Pigeon project.......sunny and 61*

Training pigeons means letting them out of the loft via a landing board and hoping they will return. It's time to start that process with Liberty and Leslie. So to acquaint them we put temporary wire around the landing board and are letting them come out that far. When we feel very courageous and have caught and imprisoned all the cats and Walter (temporarily of course!) we will remove the wire and  SEE WHAT HAPPENS! Right after the wire installation, Leslie, Liberty and Hollywood (their dad) came out on the board to get a better view of the big wide world. Amarillo is setting on 2 more eggs, so had to stay on task. Did you know pigeons average 40 miles per hour, and can sustain that for 10-12 hours.
 
 
Well last Saturday we did get courageous and let them have the choice of going out. Only one chose to, Liberty or Leslie, we know not which. Do you know when you can tell which is the male or female? When one lays an egg! Anyway, away he or she went, in beautiful large circles around the house and landed in a tree. After awhile he or she changed trees but made no attempt to return to the coop. Late in the day when her master went out in the field she circled around but went back to the tree. Remember when we were pigeon peeking to see if eggs had hatched, well we spent the next day and a half pigeon peering trying to locate that pigeon who happened to be the same color as the trees!  Well 31 hours and three stiff necks later, we found he or she in the cherry tree next to the house. Later he or she flew to the ground and then the roof of the loft and then just as the book said landed on the landing board and went in.
Some of us are not fond of the idea of trying that again!


Monday, March 30, 2015

Farm Adventures Cats and Kids.....sunny and warmer

The predicament of  posing cats and kids----A tutorial

    
When we asked "Which would you rather see a picture of  - cats or baby goats?"  Someone said  "cats and baby goats", and some others seconded the idea!  Well, I'll bet that someone had never tried to take one of those pictures!!!!!!!!!!!!!!!!!!!!
So here is the step by step process we went through, a tutorial of sorts if you ever want to try this yourself!
 
Step #1  Get a basket and line it with attractive cloth.
 
Step #2  Decide basket would look nice in front of woodstove.
 
Step #3  Try Lonesome in basket before removing baby goat from her mother.
Step #4  Realize 2 problems -
 Lonesome will not cooperate (notice his ears & tail) and he FILLS the basket-no room for kid


                                                         Step #5 
            Hurry, no, RUN through yard trying to keep baby goat from bleating,
                                             and worrying mother goat.
Step #6  Try Butterscotch ( she usually cooperates) and recruit help with photo.
Realize 2 more problems -
Butterscotch doesn't like this idea either, & "help" puts finger in picture.


Step #7  Baby goat doesn't like the idea either
and thinks backwards is way out of her dilemma.
Step #8  Baby goat and Butterscotch sort of settle in
(reservations on Butterscotch's part).--note position of her ears!
Step #9  Baby goat does settle in, Butterscotch reconsiders and leaves.
                                                             Step # 10 
                    Realize while trying to get picture forgot to include woodstove,
                                           and what happened to pretty cloth? 
Step #11 Go get another goat and another pretty cloth, reline basket,
reframe picture to include stove again, snap quick!
Note: No cat (or help) invited!
So there you have it folks: How to photograph a cat and kid in 11 easy steps!
Disclaimer: No cats or kids were hurt in the making of this tutorial, we offer no guarantees this will work for you under different circumstances, please be advised that cats and kids (of the caprine kind) are one of the most uncooperative and difficult to photograph species', and we recommend proceeding at your own risk!

Sunday, March 29, 2015

Sunday Quotes.....Sunny finally!

“Our Mind is a garden, our thoughts are the seeds
You can grow flowers or you can grow weeds.”


Well the pigeon wasn't the only one to fly the coop (more about that on Tuesday),
the rooster and hens decided to also.
Maybe he was checking to see if the Jonquils are still blooming.
And since they are, he decided to crow about it!
 

Saturday, March 28, 2015

simmering soups.........cold and looking rainy....again

French Onion Soup, this one has always been a favorite.
Since the weather hasn't warmed up yet, why not have hot soup once more?


4 medium onions, sliced

1/4 cup margarine

1/2 cup dry white wine

5 cups water

6 beef bouillon cubes

1/2 tsp. paprika

1 tsp. Worcestershire sauce

6 thick slices sourdough or French bread

Parmesan cheese


Sauté onions in margarine until browned. Add remaining ingredients ( except bread & cheese) and cook over low - medium heat for 1 hour.

When ready to serve heat to boiling, put 1 slice bread in each of 6 broiler proof bowls. Ladle soup on top and sprinkle generously with Parmesan. Place bowls on cookie sheet and put beneath broiler for 5 minutes or until cheese starts to brown. Be careful of hot bowls and contents. Serve with salad, Yum Yum!

Friday, March 27, 2015

While waiting for the babies to be born............rain....37*


Button and Thimbelina suspected something was going on Wednesday, probably because of my frequent visits. So here's Button trying to get a better look into Flossie's pen. I reminded her she'd be having her own experience in just one month!  ( If she doesn't burst first!)


One has time to think,(and take pictures) while waiting for babies to be
born, these are the storms rolling in as I was sitting with Flossie the other night
After the storms~~ Beaten down, but the jonquil's still bloom!
 
Tempest Pearl~~ not even 24 hours old

Thursday, March 26, 2015

New babies.........cloudy... very windy...41*


I was very suspicious of Flossie yesterday morning, her earliest due date. But thought maybe it was my imagination because we humans read a calendar. Anyway after numerous trips out to the barn decided I was right, she would kid. So I told her "please do this before dark!". When I saw that this wasn't going to be the case I told her "well at least before the storm starts!"  Foiled once again, but at least she was done before the strongest storm episode occurred. She finally had them about 10 pm last night, amid the thunderstorms and wind and hail. She was about five days early which usually means a couple of boys~~ while waiting for them to be born I was thinking we should name them Stormy and Thunder~~but  to our surprise we have two lovely little does, one with ears and one without, just like happened last year! Maybe we should name them Gale and Tempest or Rainie and Windie ?
Just born

12 hours old

Wednesday, March 25, 2015

Dancing with the Daffodils..................

I Wandered Lonely as a Cloud

By William Wordsworth 


I wandered lonely as a cloud
That floats on high o'er vales and hills,
When all at once I saw a crowd,
A host, of golden daffodils;                       


Beside the lake, beneath the trees,
Fluttering and dancing in the breeze.


Continuous as the stars that shine
And twinkle on the milky way,
They stretched in never-ending line
Along the margin of a bay:
Ten thousand saw I at a glance,
Tossing their heads in sprightly dance.


The waves beside them danced; but they
Out-did the sparkling waves in glee:
A poet could not but be gay,
In such a jocund company:
I gazed—and gazed—but little thought
What wealth the show to me had brought:


For oft, when on my couch I lie
In vacant or in pensive mood,
They flash upon that inward eye
Which is the bliss of solitude;
And then my heart with pleasure fills,
And dances with the daffodils.
 

Tuesday, March 24, 2015

A tale of six Kitties........Partly cloudy... 50's

Spring in the Ozarks can only mean one thing....crazy weather...... rain, wind, mud, clouds, sun and even snow are in this weeks forecast alone!
Lonesome decided even though the first day of Spring came, inside with the woodstove is still better.
Maybe it was the wind, or the chill in the air, or maybe the SUN was too bright!! 
 I know he thought the flash was.
"Yes, I know I'm cute''


"Now go away, I'm tryin' to sleep" 

Monday, March 23, 2015

Thoughts about Weather....sunny and 48*

So on Friday the 'weatherman' informed us we would have a beautiful weekend, SUNNY, STILL and 70's. And did we believe him, oh yes we did, when will we learn?? We believed him because we
wanted it to be SUNNY, Still, and 70's. What did we get? Well Saturday it was cloudy all day, the wind howled and it struggled to reach 50*, Sunday I woke up before dawn to the sound of rain on my tin roof, it rained most of the day, and just reached 60* by the end of the day, then of course the sun came out.................just as it was going down!
So while I was slogging around doing chores yesterday in the muck and the mire, I wrote this:

Whether or not there'll be weather
is never, ever the question~~
Whether or not the weatherman

will be accurate, ALWAYS is the question!

So this morning the sun is out---you guessed it, weatherman had called for clouds!
So I'm off to work outside, haul hay, clean out the barn......the usual.
Flossie's babies are due this week so baby prep starts today................maybe just maybe she'll have pretty weather for them to be born....................but we'll just have to wait and see !

Sunday, March 22, 2015

Sunday Quotes....Raining....again....


 "To see a World in a Grain of Sand

And Heaven in a Wild Flower

Hold Infinity in the palm of your hand

And Eternity in an hour" 
 
Did William Blake epitomize why we garden?


Saturday, March 21, 2015

Old-Fashioned Coffee Cake...cloudy and windy--40's

         Old fashioned coffee cake with homemade brown sugar topping


Cake:
1/2 cup sugar
1 egg
4 T. Margarine
1 1/2 cups All purpose flour
1 Tablespoon baking powder
1 tsp. vanilla
1/2 cup plain yogurt
6 T. Milk 
 
Topping:
1 cup Sugar
1 tablespoon Molasses
2 Tablespoons all purpose flour
2 Tablespoons cinnamon
 1/2 cup chopped pecans OR walnuts
4 Tablespoons Melted margarine
 
Icing:
1 cup powdered sugar
1/2 tsp. vanilla
1-2 T. coffee (or milk)
 
For the cake, combine sugar, butter, yogurt, milk and egg , beat well. Add flour & baking powder, mix well, spoon into a well greased 13 X 9 pan.
 
For topping, place sugar and molasses in a bowl and using a fork or electric beaters mix until all molasses is incorporated and sugar is evenly colored.
Add remaining ingredients in order given and mix well.
Evenly sprinkle over top of the cake and bake at 365* for 20-25 minutes, until a knife inserted comes out clean.
Cool on wire rack.
For icing mix powdered sugar, and vanilla, and just enough coffee to make a thick glaze. Drizzle over cooled cake and serve immediately.
 
Making your own brown sugar only takes a minute and the flavor is so much richer you won’t mind the extra few minutes it took to make it. If your prefer a milder taste you can use Sorghum instead of the molasses for a ‘light’ brown sugar flavor!


Friday, March 20, 2015

First day of spring, spring cleaning,aprons,and a winner! Cloudy,,,46*

                                                                       Spring Cleaning


Are we all ready to start spring cleaning? Those who have house pets and perhaps a woodstove or fireplace surely are. Well do you remember your Mom or Grandmother always cleaned with an apron on? Not so many do that anymore but I don't know why. Those pockets saved a lot of steps and the apron kept your clothes cleaner too. So let's get that good habit restored!  I know another reason - I'll borrow a line from an  upcoming Sunday's quotation - -----"when your head's full of fluff, you'll have pockets to stuff--- with a pad and a pen------ to save that thought  before it's gone again."  Happy cleaning!!!!!!!!!!!!!!!!! 
 P.S. I'd rather be outside, how about you ?

The winner of our  "waiting for spring " giveaway on FB is  ---- Stefanie Gatti  Congratulations!
 

Thursday, March 19, 2015

Everything Season....Jonquil's..Foggy..37*

Tis The Season - Everything Jonquils..............................

Poems, recipes, pictures, Jonquils everywhere stirring up memories. In my part of my native New England, I did not see old homesteads with Jonquils everywhere. Perhaps it has been settled too long, and with "rearranging" especially if machinery was used they've been destroyed. But here in the Ozarks they still abound. When we moved to this property there was no abandoned homestead. But directly to the East and West of us people had lived decades ago, and yes the Jonquils still bloom. My start comes from one of those places, carefully dug and shared to my homestead. Eventually I met the couple who had lived there, and this is how.  When we arrived here with a long car in tow behind the E-Z Haul truck, we could not make the last bend in the road. So the car had to be unhitched and left until we could come up with another plan. You can imagine getting started on a building project involved many trips out to the lumber yard. After a couple of weeks, bags of vegetables started  appearing on the hood of the car, we'd had to leave beside the road! We were very grateful, as heating canned goods on a camp fire had already grown old. Eventually the folks came to say Hi and welcome us. After introductions and brief talk one of them said "well we'll not hinder you from your work" and they left. They were the ones who had started their married life on the place next door where eventually I would gather Jonquil bulbs. Even though we did visit with them occasionally through the years I never thought to ask why so many Jonquils are in these hills. But this is what I have since heard. At the feed and seed store long ago, when folks came in to get their supplies for planting  ( yes, even wheat & oats were grown here when there was a railroad) the store owner passed out a few Jonquil bulbs as a gift for the farmer's wife. We've been so cold this spring Jonquils are just starting. In one of these pics you'll see the foundation stones and their well, and in the other the Jonquils with foundation stones in background. I know it is a minimum of 75 years since they lived there, and through all the leaf litter, YES the JONQUILS still bloom!


Wednesday, March 18, 2015

More Spring cleaning.....raining and 39*

Rainy days in Spring should be used for cleaning house. In theory only. Who wants to clean out closets on a dark, dreary day? Not me!! You can approach this task more efficiently on a sunny day.
But wait  -  on a sunny day one needs to be outside working. Well that's my dilemma so I've decided I've offered lodging to our Tin Can Clock project long enough. They must be sold  to make available space for our newest idea.  The large tins ( Snow Cottage OR Puppies w/Pheasant) are $5. each plus $7. packaging and shipping ( I checked w/P.O. yesterday this is the actual cost) for a total of $12. The smaller ones ( Scarecrow) are $3. each plus $5. packaging and shipping for a total of $8.These clocks are made from actual tins, that still open (would be great to package  a small gift  inside ) they  take one AA battery and have a punched hole for hanging. They are a unique, one of a kind gift, quite a conversation starter!
Simply click on the link below to take advantage of this sale! And help us with  our 'spring cleaning project' !
https://www.facebook.com/jonquiljunction/timeline/story?ut=43&wstart=0&wend=1427871599&hash=-1053974722495624546&pagefilter=3


https://www.facebook.com/jonquiljunction/timeline/story?ut=43&wstart=0&wend=1427871599&hash=-1053974722495624546&pagefilter=3

Tuesday, March 17, 2015

Spring cleaning leads to a craft tutorial ..... Partly sunny and 60*

Spring cleaning over the weekend and came upon some old projects we’d made in the past.  Thought this one was especially nice for spring, when pretty seed packets abound. You can still buy pretty packages of seed quite cheap at Dollar store or carefully  save your packets as you plant this year and use them. When we made these years ago for gifts we used fresh seeds and left the packages unopened , so the recipient got a double gift, in that they could plant the seeds if they wished.


All you need are six seed packets of the same size
a piece of stiff cardboard
a glue gun and
whatever embellishments you want to add like moss, dried flowers, a little bird or nest .....use your imagination........
 
First cut your base and set aside, 
my seed packages were 4.5 x 3.25 so I cut my base 4.5 x 5 you could cut it bigger if you wanted more room to decorate around the house too .
Now on two packages of seeds fold in about a 1/4 inch on each of the short ends and crease well,  like so:
 Now with package standing on one of the long sides and ‘creased’ edges facing in run a line of hot glue along one crease and immediately stand up your third package of seeds on it’s short side making sure bottom edges are even and press firmly into glue repeat on the other end of the package that is laying down this is what it should look like now from the back:
One package laying  on it's side, with creases on each end,
two packages standing up glued to each crease.
 
Take a forth package of seeds and again standing it up glue it on either side to the two creases remaining you will now have a “box” shape with an open top and bottom that looks something like this:
Gluing the final side together


Your seed package 'box'
Now you need to make your ‘gable’ ends , grab the top of one of the standing up seed packs and crease in the center then fold each side in to form a point like so, do this on both front and back

once you crease them well fold them back up slightly, as this is where you will attach the roof in a second , you can see this in the picture below
 
To attach the roof , put glue on two of the 'tabs' you just formed in the last step, matching up the long side of your fifth seed packet with the center point on front and back press firmly into the glue you just put on the 'tabs', now repeat with the remaining two 'tabs' and last seed packet (it helps to reach up through the open bottom at this point to press the glued tabs firmly against the roof)
To give your roof more of a 'barn roof' shape crease the long edges
of the packages where the 'over hang' is like I did here
Glue to base and decorate as desired
 This is really a lot easier to actually do than it is to explain! Try one and you'll see.
Here are a couple that I made when I wasn't trying to photograph every step!
Front

Back
use all one kind of seed package or mix it up with different ones
 on each side!


Monday, March 16, 2015

The adventures of Valerie and Grace...Sunny... 61*

Can you believe it? Two sunny days in a row!! Rain coming back tomorrow and Wednesday. I want to take pics of goats in the pasture but afraid they'll sink to their bellies so had to settle for this. Now that Valerie and Grace are officially offered for sale I want more pics for their Adventure story.
We all hate to see them go, and the money and extra pen will be small compensation for their presence. Can you tell we're in the wrong hobby? Anyway here's their newborn and current picture.
 

Please click on 'older posts' to see all our posts! Thanks :)

The items we offer are as varied as the weather in these hills!
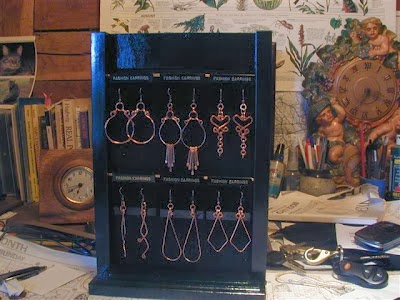
Hand-hammered copper jewelry, handmade wood case clocks, biscuit and rag quilts, handsewn infant gifts, handcrafted soap, & homespun tales and photos of our menagerie of four footed and feathered friends.


Copper earrings

Copper earrings